I recall how I started using a design tool with no sense of direction. I already knew a bit about Photoshop on my own. I had seen some YouTube videos, and got myself convinced that I was prepared to begin. I wasn’t. Not because I lacked potential, but because no one had explained to me what works and what doesn’t. I wasted weeks trying to make things appear good without knowing exactly what to do.
That experience changed everything. Today, I have done multiple design projects and have worked as Graphic Visual Developer for top brands and institutions. Design has been central in nearly everything I have created in my work.
I do not say all this to impress, but to put it in some perspective: this guide is the result of years in doing this work, rather than mere theory. And I’ve realized that it is not talent that makes someone a good designer. It’s knowing where to start.
Mordor Intelligence estimates the graphic design industry to have a worth of $59.29 billion in 2026 and a projection of 85.53 billion by 2031 with a growth of 7.6 per annum. More than 90% of companies believe that design is part of their branding work, and over 60 percent of all the graphic design work being created now is for social media. That is not a market figure. That is demand. And it is part of every one who is a learner.


This guide is my honest attempt to give you a clear path I wish I had when I was starting.
You Don’t Have to Be Naturally Talented
The first thing worth saying out loud is that: graphic design is not a gift. It’s a craft. The idea that “creative people are born that way,” that “some people simply have creative eyes and others don’t” is one of the most persistent myths in the creative world. It keeps a lot of potential people from ever trying.
Remember that first time you were shown how to drive or cook a proper meal. You were terrible at it first. Then you got better. Design works in the same manner. All professional designers that you like have passed through a period of creating an object that seemingly appeared rubbish. They picked the incorrect fonts, created bad designs and questioned whether they would ever get it right one day. The sole difference between them and one who has never learned is that they continued practicing consistently.
At its most basic level, design is communication. It’s the act of taking an idea, a message, or an emotion and expressing it visually so someone else can feel it instantly. That’s it. You don’t need to be an artist. You do not even need to have attended a school of design. You just have to be curious, ready to practice, and realize that your first 12 projects are merely trial and errors, and that doesn’t imply you won’t improve.
In 2026 the design tools available to beginners are now easier to access, more user friendly and powerful as compared to those that professional designers out there had a decade ago. And there has never been a better time to start than now.
Start With One Tool, Not Ten
At the beginning, I was switching between CorelDRAW, Photoshop, and any free software I could get on the Internet. I believed that I could be better at my skill if I just had many design tools. What it really did was cause me slowness and shallow understanding of everything and a deep understanding of nothing.
My progress did not pick up any real pace until I got serious about learning to use a certain tool. I can still find this same error in beginners today. They invest weeks of study on what tool is the best and they make nothing in the end. So let’s settle it simply.
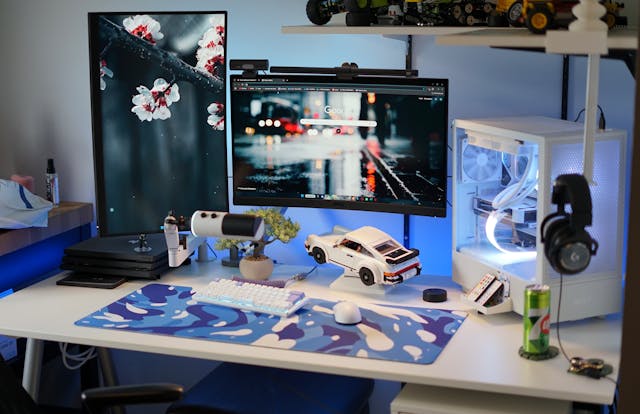
The most beginner-friendly tool would be Canva in 2026. It is free to use, entirely web-based, and allows you to create social media images, presentations, posters and minimal branding materials without any learning curve that makes you alarmed. Canva has more than 170 million users worldwide and is valued at $49 billion, which is no coincidence that the platform is at that level since it actually helps people who are new to design. Day one: Canva is the correct solution to begin creating, whether it is in the name of your business, your content or your personal brand.
If you know from the start that you want to work professionally, designing for clients, working at agencies, building websites or apps, then Figma is worth your time. apps. It’s the industry standard for user interface and product design, holding a 40.65% market share among professional design tools. No charge, browser-based, and collaboration-based. The learning curve is steeper, and the reward is a reality.
Adobe Express is intermediate between the two, more powerful than Canva, and the logical transition point to Photoshop and Illustrator on the growth front. It is an idea worth thinking about in case you are already within the Adobe ecosystem.
Choose one depending on your sincere intention. Commit to it for 30 days. Ignore everything else. The tool is not what makes a great designer. Your eye, your creativity, and your practice do. The tool is just where those things happen.
Four Things That Actually Make a Design Look Good
Among the principles of design I used over the years, whether it is to design a journal or a brand name or to create content of tech firms, I discovered that what you do need are four foundational principles. These principles are more important than all other items combined. These aren’t abstract theories. They are the reasons certain designs look professional and others make you feel wrong but you do not know why.
1. Contrast
It is because of contrast that you are able to read this sentence. Where two elements are significantly different in color or size or weight or shape, the eye knows where to look first. Imagine dark color text on a light background. Huge headline paired with a subtle subheading. An outstanding call-to-action button on a neutral page.
The instances I just mentioned can give the end-user of your work a clarity of information, while communicating the message therein seamlessly. In the absence of contrast, all becomes mixed up and the eye becomes confused. A strong design takes the viewer through it without his or her awareness of being led.
2. Alignment
Nothing makes a design look amateur faster than elements floating in random places. Alignment is the invisible grid that holds everything together. When text, images, and buttons all share a common edge or center line, the design feels ordered and intentional, even when the visual style is playful or energetic. Pick up any well-designed magazine spread or app interface and notice how nothing is placed randomly. That’s alignment at work.
3. Repetition
Repetition creates consistency, and consistency creates trust. Once you have used the same font on headlines, the same color combinations in all your graphics, the same appearance in all your work, the brain of the viewer will begin to see an identity. That is precisely what makes strong brands seem united. All touchpoints are made using the same choices of design.
The use of a consistent visual language through all the assets is not an option when I create the visual content for brands. This is a reminder to beginners; do not succumb to the temptation to change your font or color scheme whenever something is flat. Uniformity is the appearance of professionalism.
4. White Space
This is the first impulse of most amateurs. They want to cram as much into a design as possible, to fill all available space with pictures and texts. The outcome is always not appealing or readable. The deliberate gaps between objects are known as white space. Always give your design some breathing room. It makes content easier to scan, gives the eye a place to rest, and makes the elements you do have feel more important. This is the only idea that Apple created its visual language around. One should always eliminate and not add something. Less is more!
The four principles are not going to make you an expert overnight. But they will provide you with a sound structure of how to examine what is wrong with a design when something is not working, and how to make it work.
Three Small Projects to Try Before Anything Else
The biggest creative killer I have ever seen, among students, prospective designers, and even professionals, who are attempting to enter the field, is not absence of talent, or absence of tools. It is the paralysis of indecision on what to create. So here are three projects that are small enough to accomplish, and real enough to teach you something.
1. Social Media Design
Begin with a social media design. Choose something that you truly care about. That could be a quote, something about your business, something in your niche and create one square graphic for Instagram or LinkedIn. The constraint of a fixed canvas size and a single message forces you to make real decisions about typography, color, and layout.
Repeat 5 times using alternative visual techniques on the same project. You will then be learning more than a week of reading about design in those five iterations.
2. Event Flyer
Design a basic event flyer. Assign yourself an imaginary event. Could be a community gathering, a workshop, a local exhibition, etc. and create a flyer to communicate the name, day, place. Use one catchy image for the design. Flyers are brilliant practical projects because they require you to organize information in a way that is scannable at a glance. You will soon find out, by trial, whether your hierarchy, the manner in which your design attracts the eye, is effective or not.
3. Logo Design
Come up with a personal logo. Not for a client — for yourself. Just assume you have a business. Then design a logo for it. Logo design is hard as it requires simplicity. The best logos are the simplest ones. A good logo works in black and white, at the size of a favicon, and as a billboard. Trying to achieve that teaches you more about visual balance and reduction than almost any other project.
You should not wait until any of these are perfect before you can move on. The ambition at this level is not masterpieces but repetitions.
Good Free Resources Worth Bookmarking
You do not have to spend lots of money to study graphic design professionally. The internet has more quality design education than most people will ever consume. The problem isn’t access. It is knowing where to search and how to avoid the noise.
1. YouTube
YouTube remains one of the most underrated learning platforms available. Channels like Flux Academy, and The Futur offer substantive education, not just a snack of tips, but a real exploration of how professional decisions in design are made. The founder of Futur, Chris Do, has taught design craft and business for years and his content is more than what you would spend thousands on in a formal course.
2. Google Fonts
For typography, which is one of the most crucial but the least considered aspects of design, Google Fonts is your free library. Learning how typefaces convey personality and how font combinations either work or fail a design is a technique you will apply in all your projects you conduct. The font combinations that Canva suggests are a good place to start when you are not certain.
3. Colors.co
For color, Coolors.co is a free palette generator allowing you to create a compatible combination when you are not sure where to start. The free Adobe Color allows you to create palettes based on real-life color theory: complementary, analogous, triadic, but will provide you with a more principled basis than simply grabbing colors you like.
4. Behance and Dribbble
For inspiration, visit Behance and Dribbble. Both are sites where professional designers post actual work, and just seeing quality design daily will train your eye in some ways that cannot be completely replicated in tutorials. Your taste grows through experience. You will start to notice patterns, preferences, and possibilities that eventually show up in your work.
Habits That Hold Beginners Back
Over the years, I have seen poor patterns manifesting in early design work. These are not a failure indicator, but the indicator of being new. But identifying them at the early stage will save you months of puzzlement as to why your work is not landing well.
The most widespread problem is likely to be using a large number of fonts. When a design is flat, you are tempted to switch to a new typeface, then to another until you have four conflicting visual personalities in a single work of art. Note this simple rule: not more than two fonts in one design. One for the headlines, one for the body. The diversification is based on size, weight and spacing, not on increasing the number of typefaces. When there is no other typographic guideline that you follow, follow this one.
Another is disrespecting hierarchy. Hierarchy is the sequence in which your eye travels through a design — what it sees first, second, and third. When all sizes and visual weights are equal, there is no hierarchy and the eye of the viewer does not know where to begin. Every design needs a clear lead element, whether it’s a headline, an image, or a focal point that does the work of saying “begin here.”
Next is the trap of following popular trends without knowing its basics, which many people fall into at an early age. Trends indicate what is culturally new at a particular time, and there is nothing wrong with following them. But when you take steps to recreate trendy aesthetics without learning why certain design choices are effective, your work will always remain a mere imitation of something, as opposed to a personal opinion. Learn the principles first. Then trends as secondary.
Finally, “not zooming out.” The vast majority of design software allows you to design at 150-200% zoom level. To you, every pixel looks great and nicely readable. Yet your work will hardly ever appear to your audience on such a scale. Keep it at 100% zoom level occasionally (or even 75). You’ll notice that what appears to be well designed in closed view might be overcrowded, unbalanced or unreadable when viewed in reality.
How To Create a Strong Portfolio Before You Have any Clients
This is one of the questions that are asked all the time, and they are justified by this reason. Without a portfolio, you can never get clients, and without work, there is no creation of a portfolio. It is as though it is a circle with no exit.
This is what I have practiced: self-initiated projects are fully legitimate portfolio projects. Actually, one of my most valuable projects in the portfolio was stuff I created purely for myself, such as templates that I created out of my personal workflow and then began to share and, eventually, sell. By the time I created my YouTube channel, I had previously made a library of design templates. I did not leave those files sitting on a hard drive for nothing.
Another strong move is redesign exercises. Pick a brand you think has poor design — something with an outdated logo, confusing packaging, or a website that feels like it was built in 2009 — and redesign it. Do it for practice, not for profit. These unsolicited redesigns show exactly how you think about design problems. And they enhance compelling portfolio pieces because anyone looking at them immediately understands the context.
Another option is to volunteer your services to local non-profits, community organizations or small businesses which evidently require design services. Admit that you are gaining some experience. Jazz it away at a low cost or free of charge and give it the seriousness it deserves as if you are paid. The feedback you get from working with a real person who has real expectations is invaluable. And the work ends up in your portfolio.
At this point, your portfolio does not have to be comprehensive. It should present three to five works that can be used to show that it has clear thinking, purposeful choices and work that appears thoughtful and thorough. Always quality and not quantity.
One Thing to Do Right Now
This has been a valuable time spent reading it. However, the process of reading is not the end, and there is a bigger difference between learning about design and applying it in practice than most individuals thought until they made it.
Now this is what you need to do: open whatever tool you have chosen to begin with and in 20 minutes create something. Anything. A graphic with your name on it. A poster of a non-existing event. A quote of one of your admirers, design it in a manner that is convenient to you. It doesn’t have to be perfect. It just has to be made.
The real deal is that you’ve created something, and that’s the evidence that you have begun no matter how crude it is. And beginning is the thing that only counts now.
You’ve read the guide. Now go create something.

Akpan Unwana is a digital entrepreneur and graphic design professional focused on helping people build authentic skills that generate sustainable wealth. He shares practical insights on digital income, skill monetization, and financial growth through MoneyBreez. Read More.
- Graphic Design for Beginners: Best Tools & Tips to Start in 2026 - February 22, 2026
- How to Start a Blog in 2026 and Turn It Into a Steady Income Stream - November 10, 2025
- 2026: The Business Sectors Creating the Next Wave of Millionaires—How to Tap into - November 6, 2025